Create your agent
Spin up your first AI voice agent — pick a starting point, set the basics, and choose its voice, step by step, with pictures.
Your agent is your AI receptionist — it answers the phone, talks to callers, and handles enquiries for you. Creating one takes a few minutes: you pick a starting point, give it a name and a greeting, then work through a short checklist.
This guide covers getting your agent off the ground — picking a starting point, setting the basics, and choosing how it sounds. The later steps — your knowledge base, phone number, and going live — each have their own guide. If you can fill in a form, you can do this.
What is an agent?
Think of an agent as a new team member who answers the phone. You decide what it's called, how it sounds, what it helps with, and what it knows — and it handles your calls around the clock.
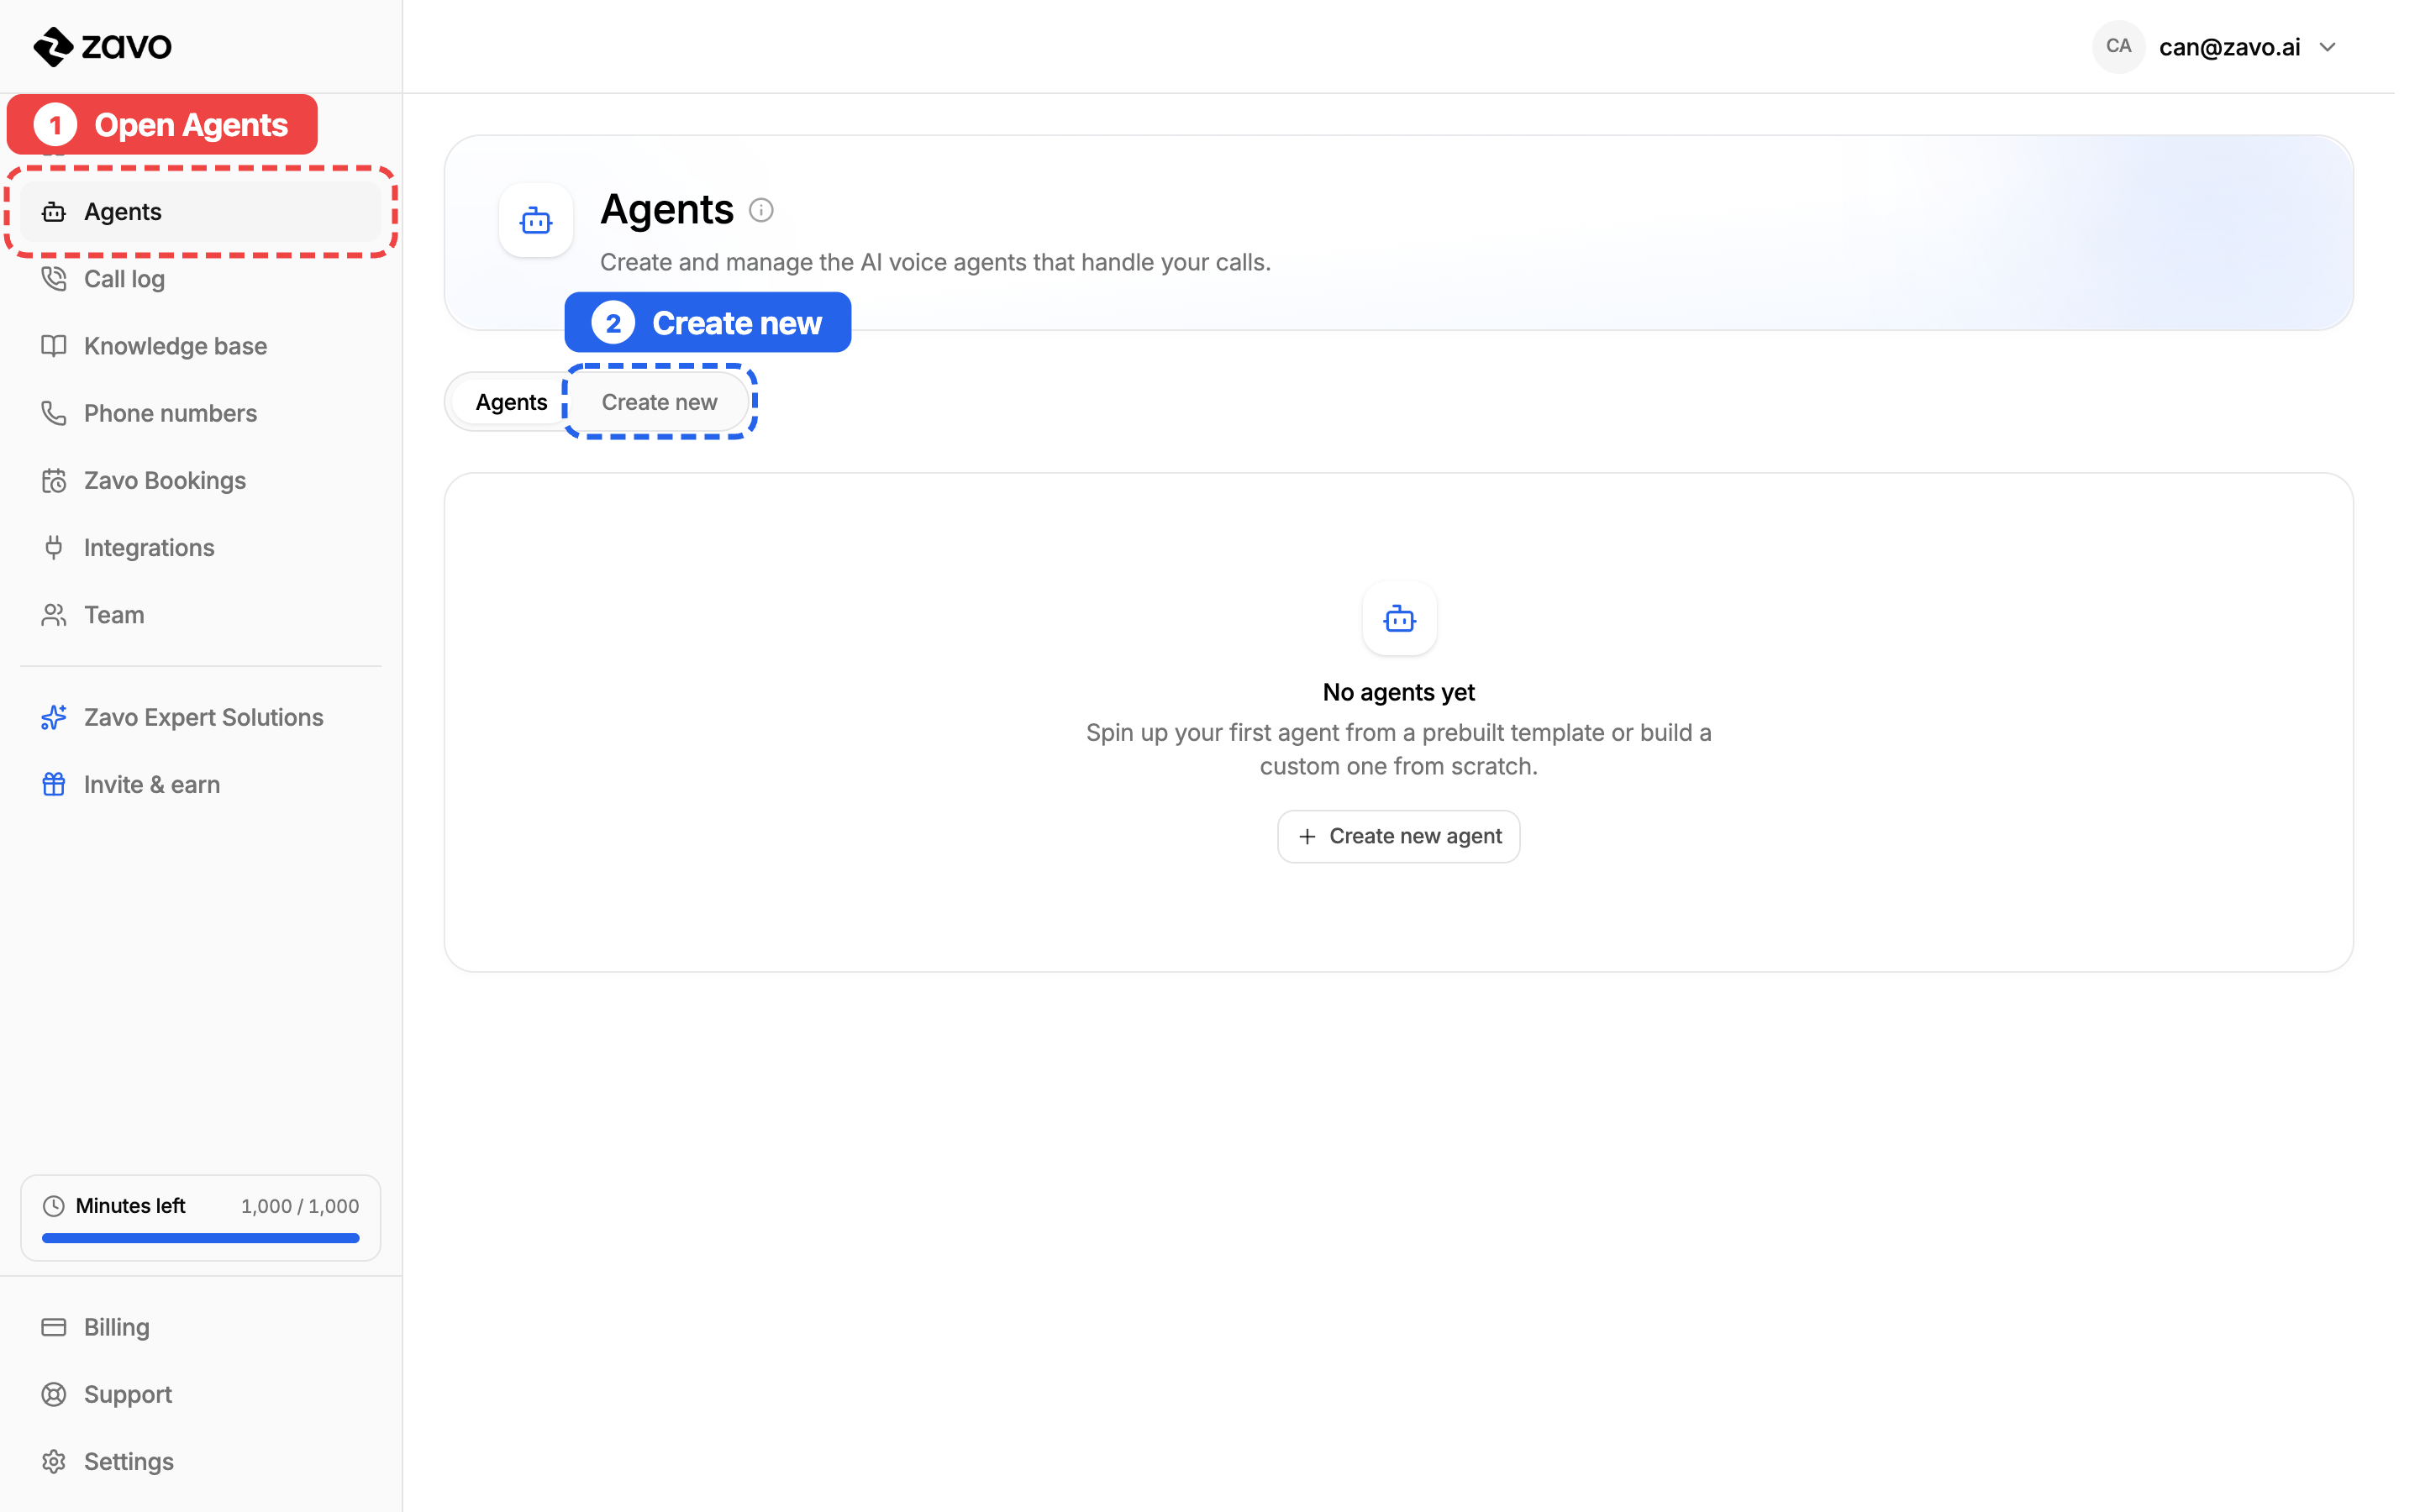
Step 1: Open the Agents page
In the menu on the left, click Agents. Then switch to the Create new tab to see the ready-made agents you can start from.
Step 2: Pick a starting point
Each card is a ready-made agent, already set up for a common job. Pick the one closest to what you need — you can change everything afterwards.
- Support Staff — answers calls, handles common questions, and escalates the rest.
- Secretary — screens spam, takes messages, and puts the right callers through.
- Appointments & FAQs — books people in and answers your most common questions.
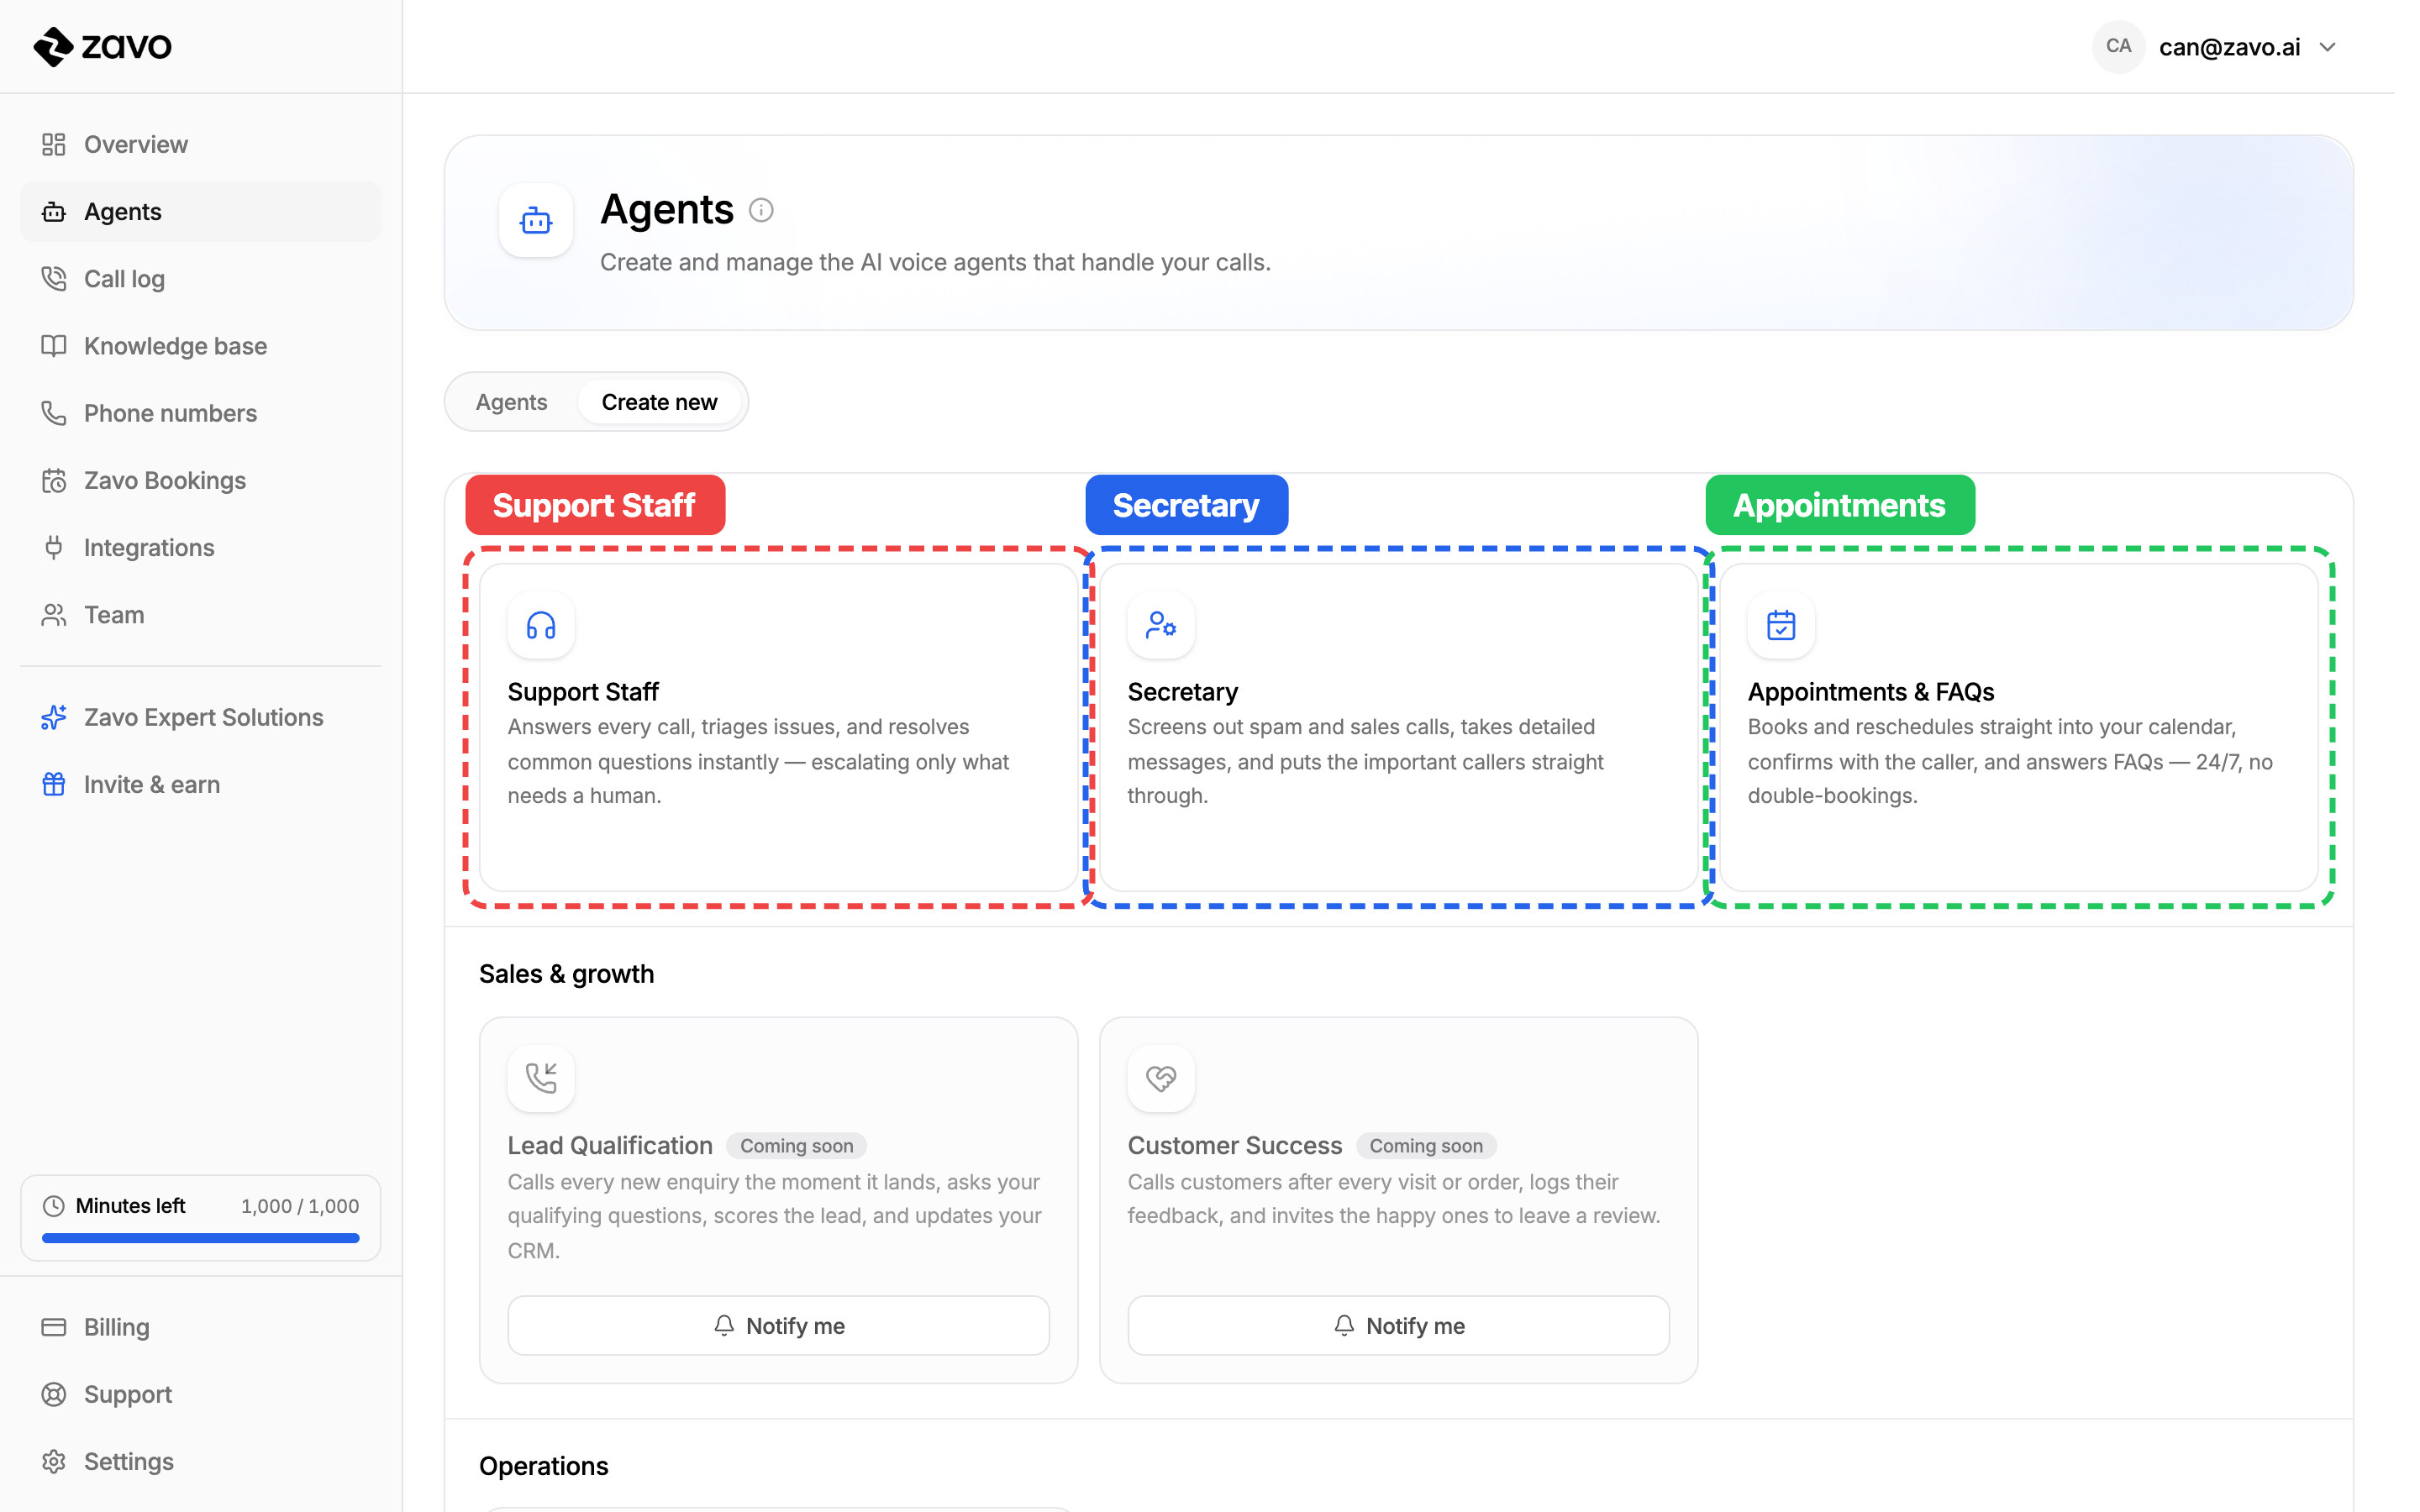
Prefer to start from a blank canvas? Scroll down to Build your own agent and set everything up yourself.
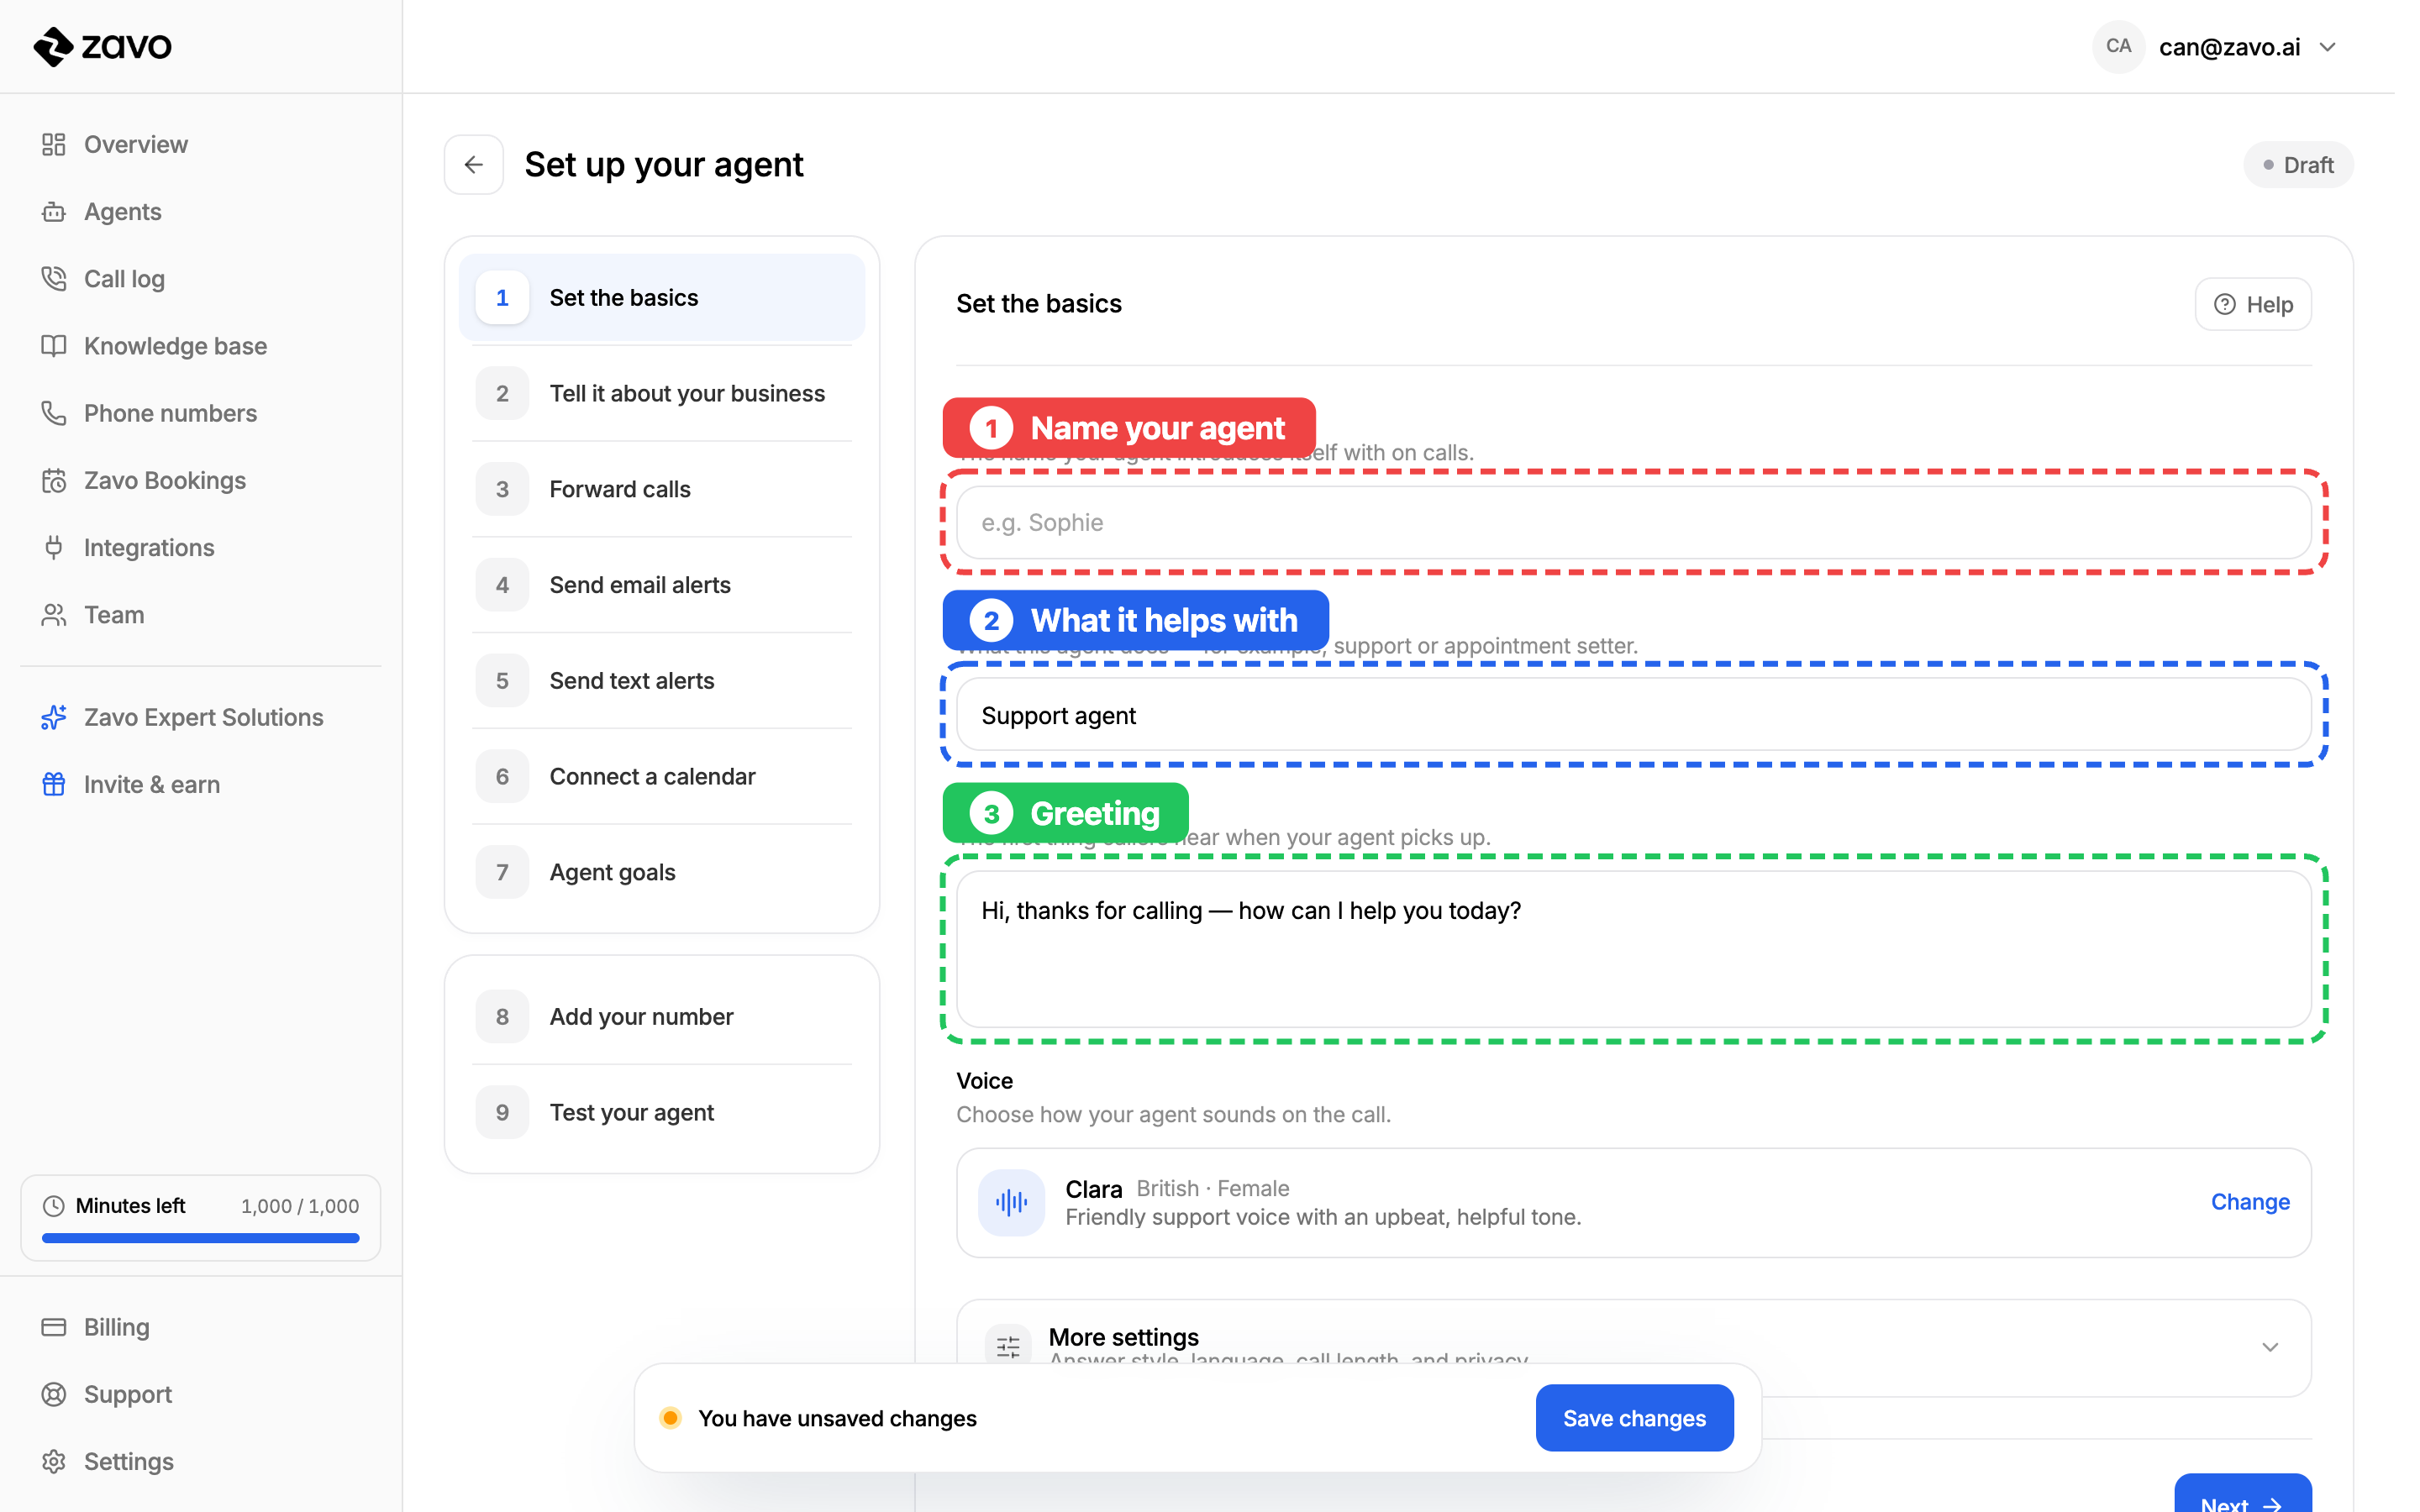
Step 3: Set the basics
This is your agent's identity. Picking a ready-made agent fills most of it in already — just tweak it to fit your business.
- Name your agent — the first name it introduces itself with, like "Hi, this is Sophie."
- What should it help with — a few words on its job, like Support or Bookings.
- Greeting message — the exact words callers hear the moment it picks up. Keep it short and welcoming.
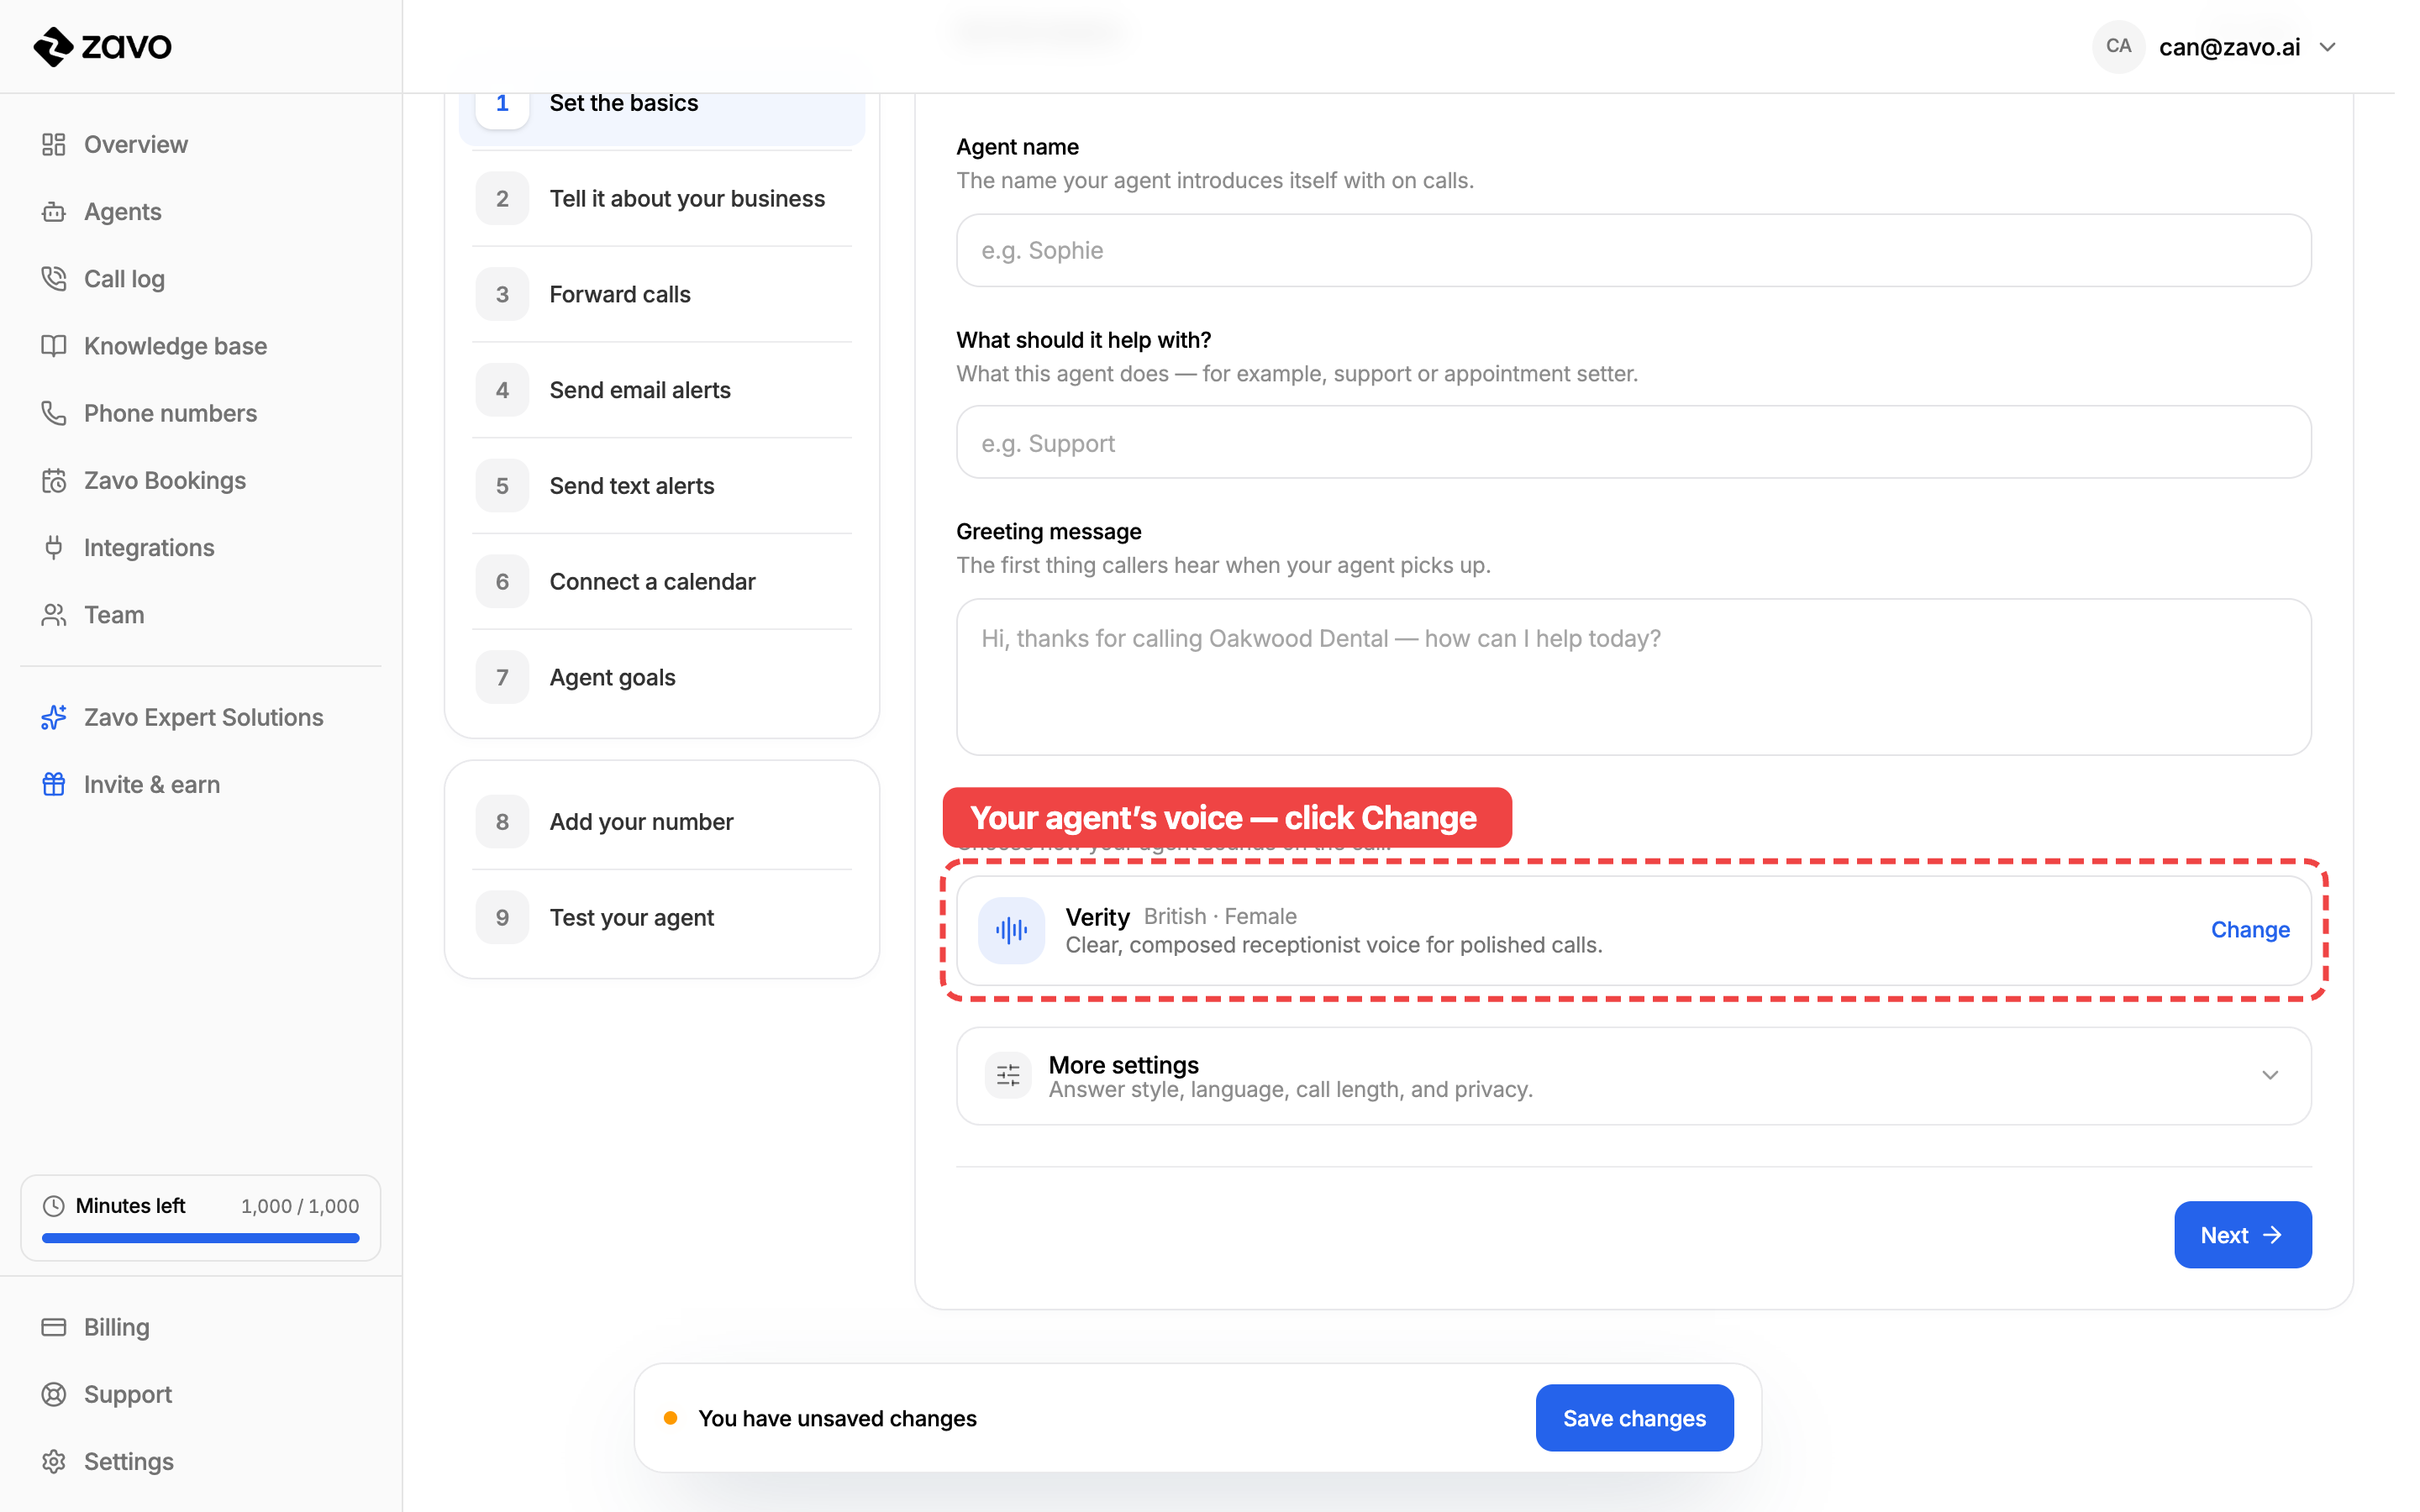
Step 4: Choose a voice
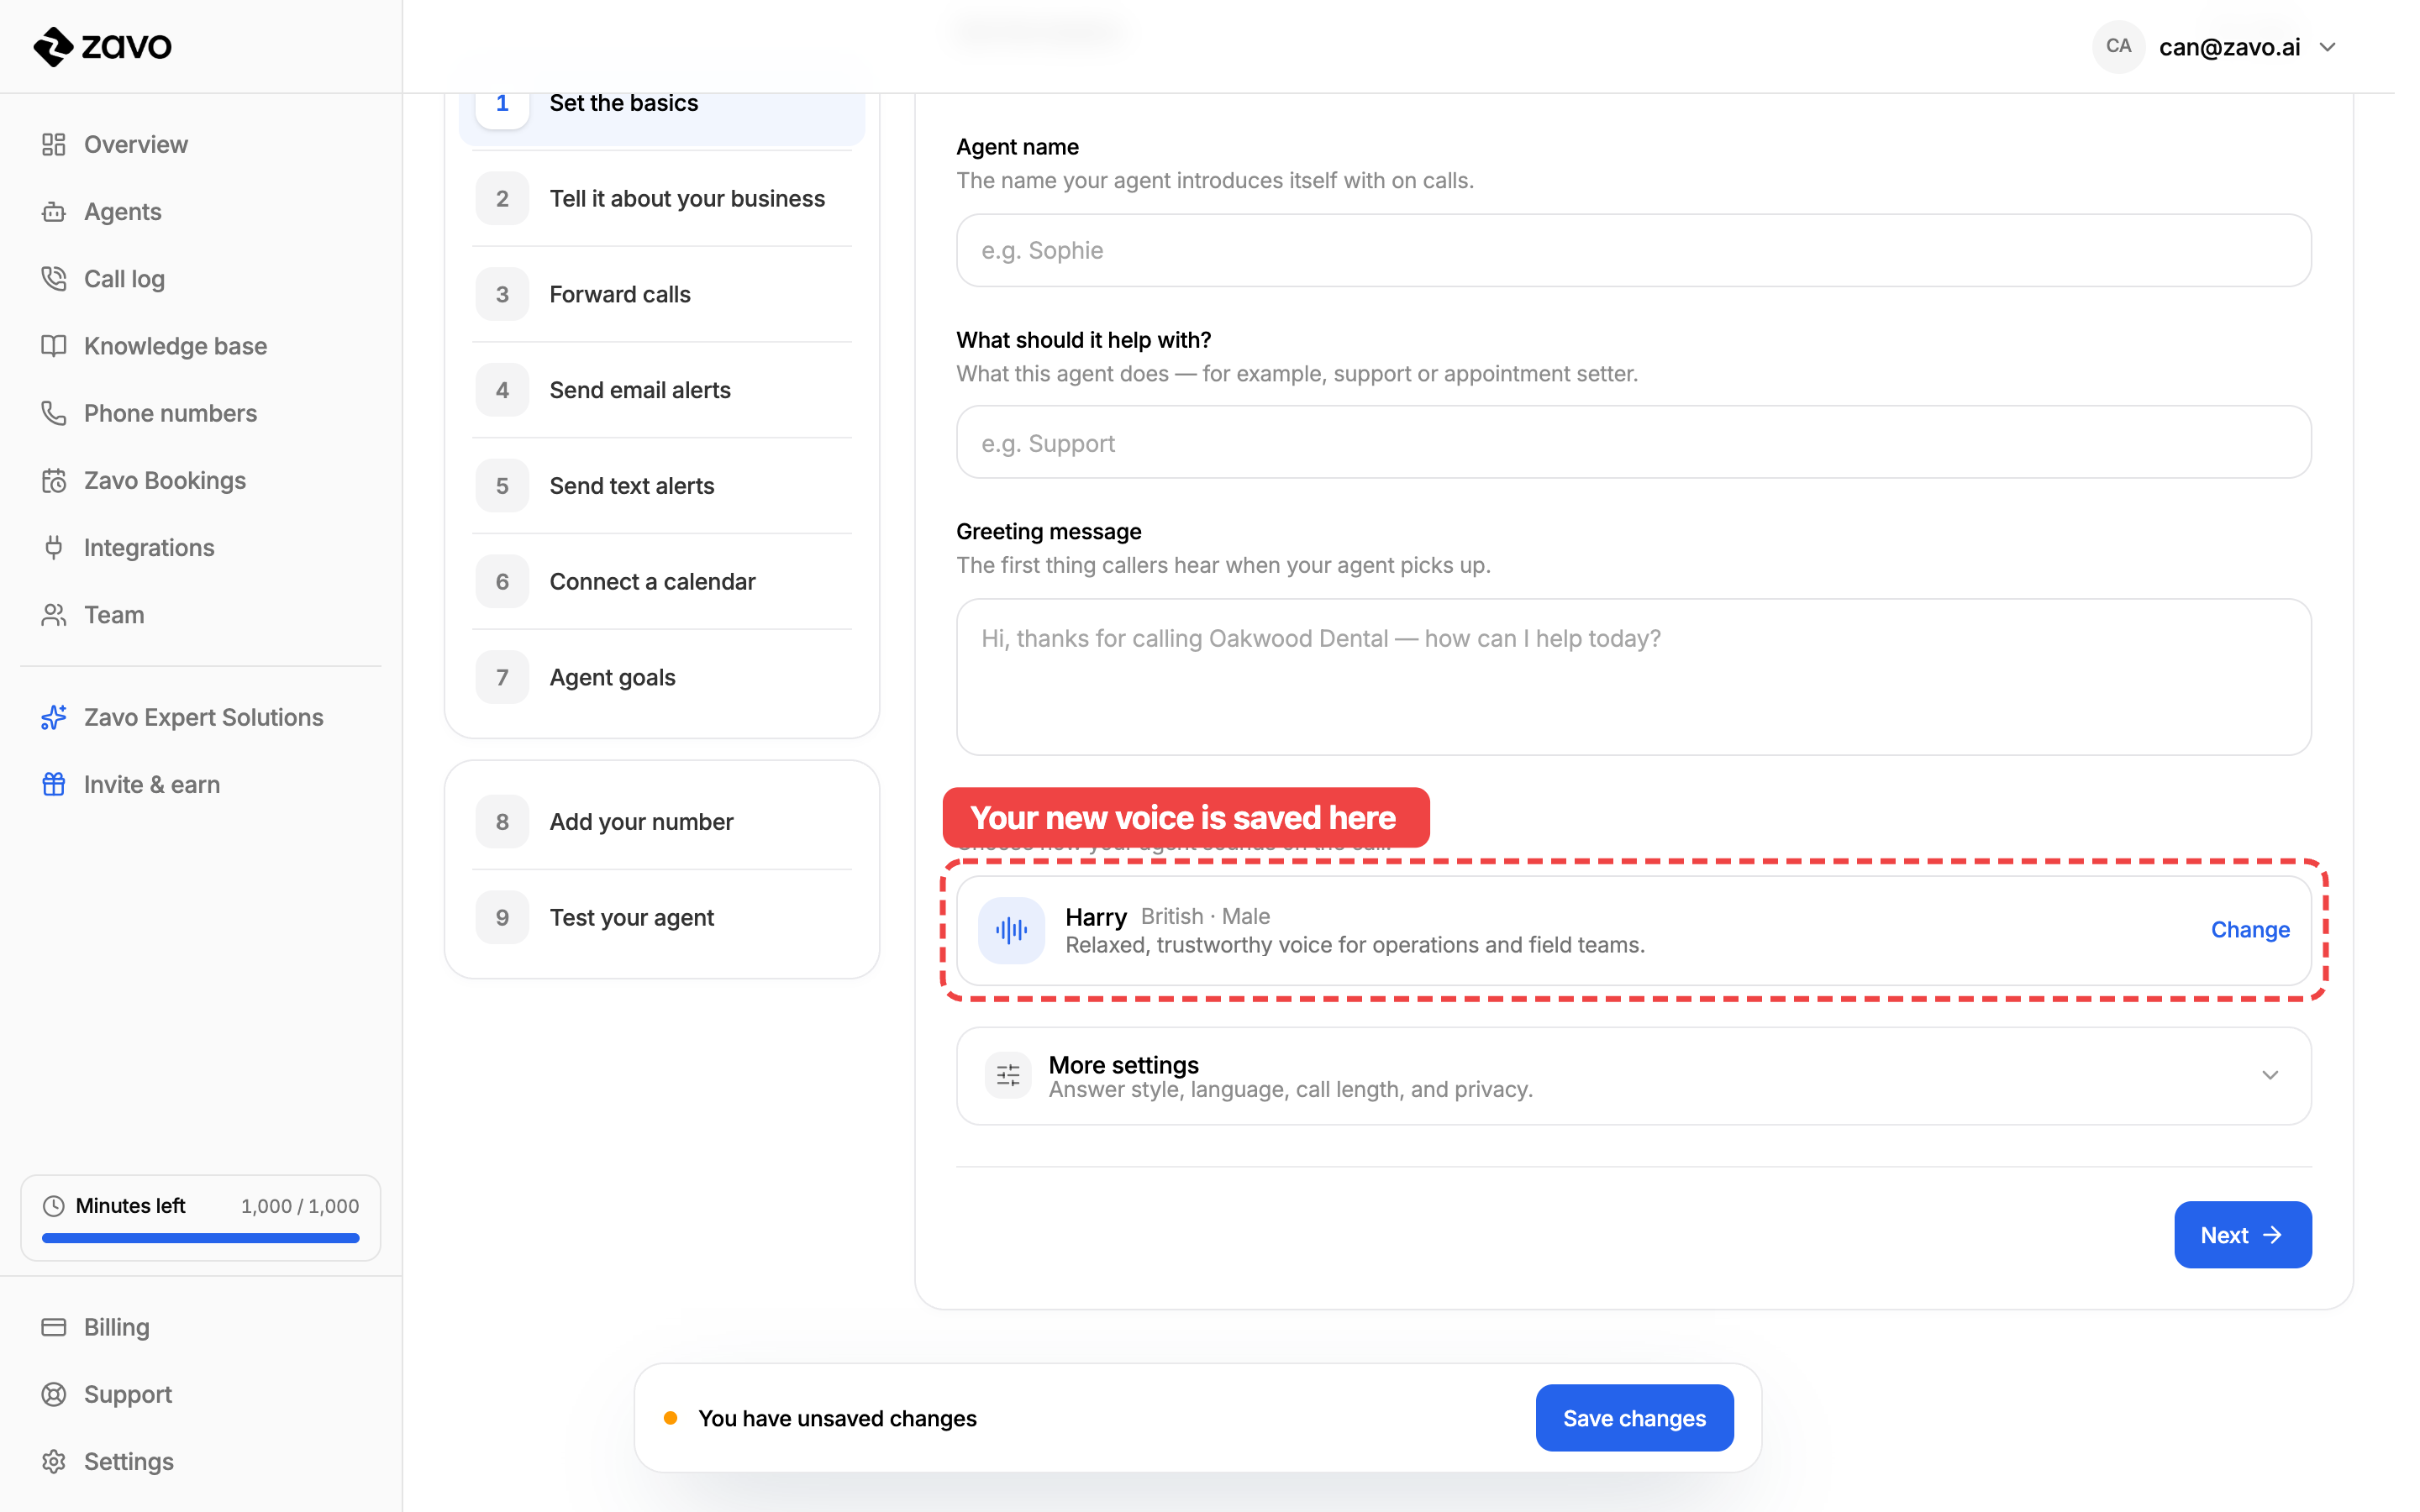
The voice is the first thing your callers hear. It sets the tone for every conversation — warm and friendly, calm and professional, however you want your business to come across. You set it right here on the Set the basics step.
Find the Voice card — it shows the voice your agent uses right now. Click Change to hear the others.
A list of voices opens up. Here's all you need to do:
- Press play on any voice to hear a short sample.
- Click the one you like — a tick appears next to your choice.
- Click Done to keep it.
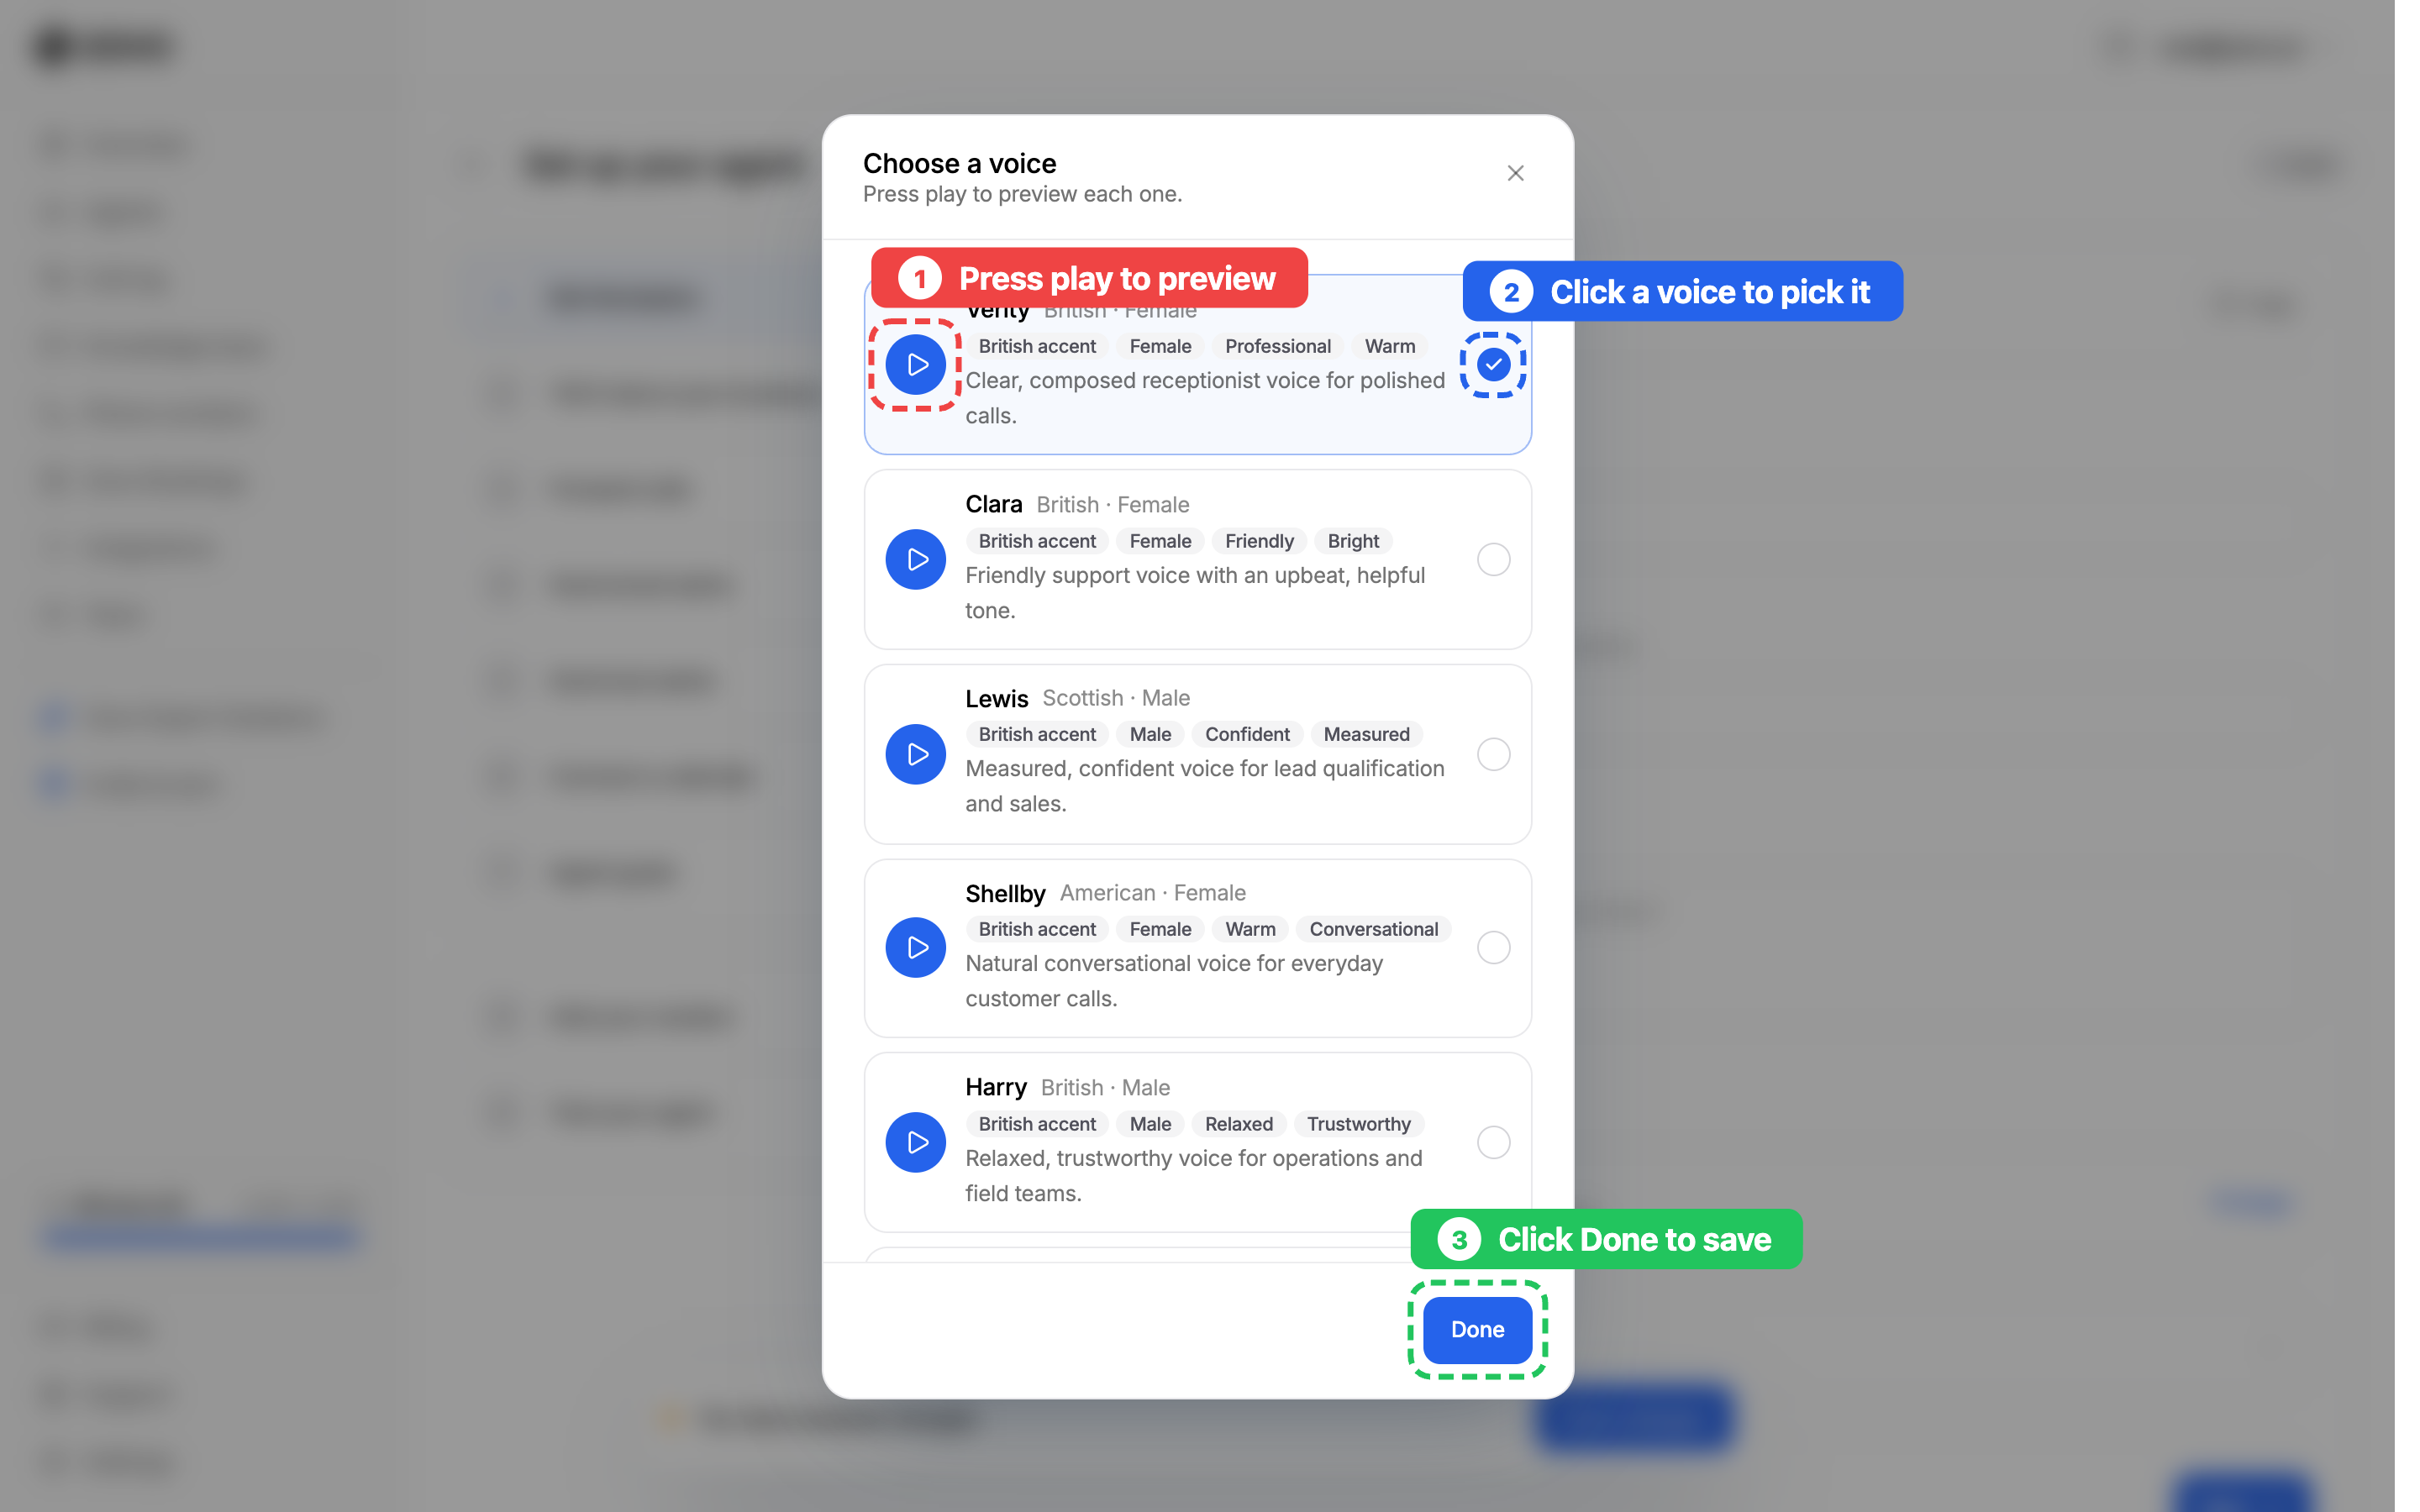
Each voice has a short label — like British · Female or Scottish · Male — and a few tags describing its style, so you can find the right fit at a glance.
Take your time pressing play on a few. The sample is exactly how your agent will sound to callers.
Once you click Done, the Voice card updates to show your new choice. That's the voice your agent will use on every call.
Tips for a great agent
- Start from a ready-made agent. It fills in sensible defaults so you only need to tweak, not build from nothing.
- Write the greeting the way you'd answer the phone yourself — friendly, short, and on-brand.
- Match the voice to your callers. Play the sample out loud — a clinic might want calm and reassuring, a trades business relaxed and down-to-earth.
- Do the basics first, then add a knowledge base. A name, a greeting, and a voice are enough to test; the more you teach it afterwards, the better your calls get.